• MEET MICHELLE
    • AS SEEN IN
  • greenhouse
  • playhouse
  • BLOG
  • Shop My Style
  • GARDENING MUST HAVES
  • SEARCH
Menu

iron & twine

Street Address
City, State, Zip
Phone Number

Your Custom Text Here

iron & twine

  • ABOUT
    • MEET MICHELLE
    • AS SEEN IN
  • greenhouse
  • playhouse
  • BLOG
  • Shop My Style
  • GARDENING MUST HAVES
  • SEARCH

Before & After | Patio Makeover

November 4, 2016 Michelle Cannon Smith
Patio Before

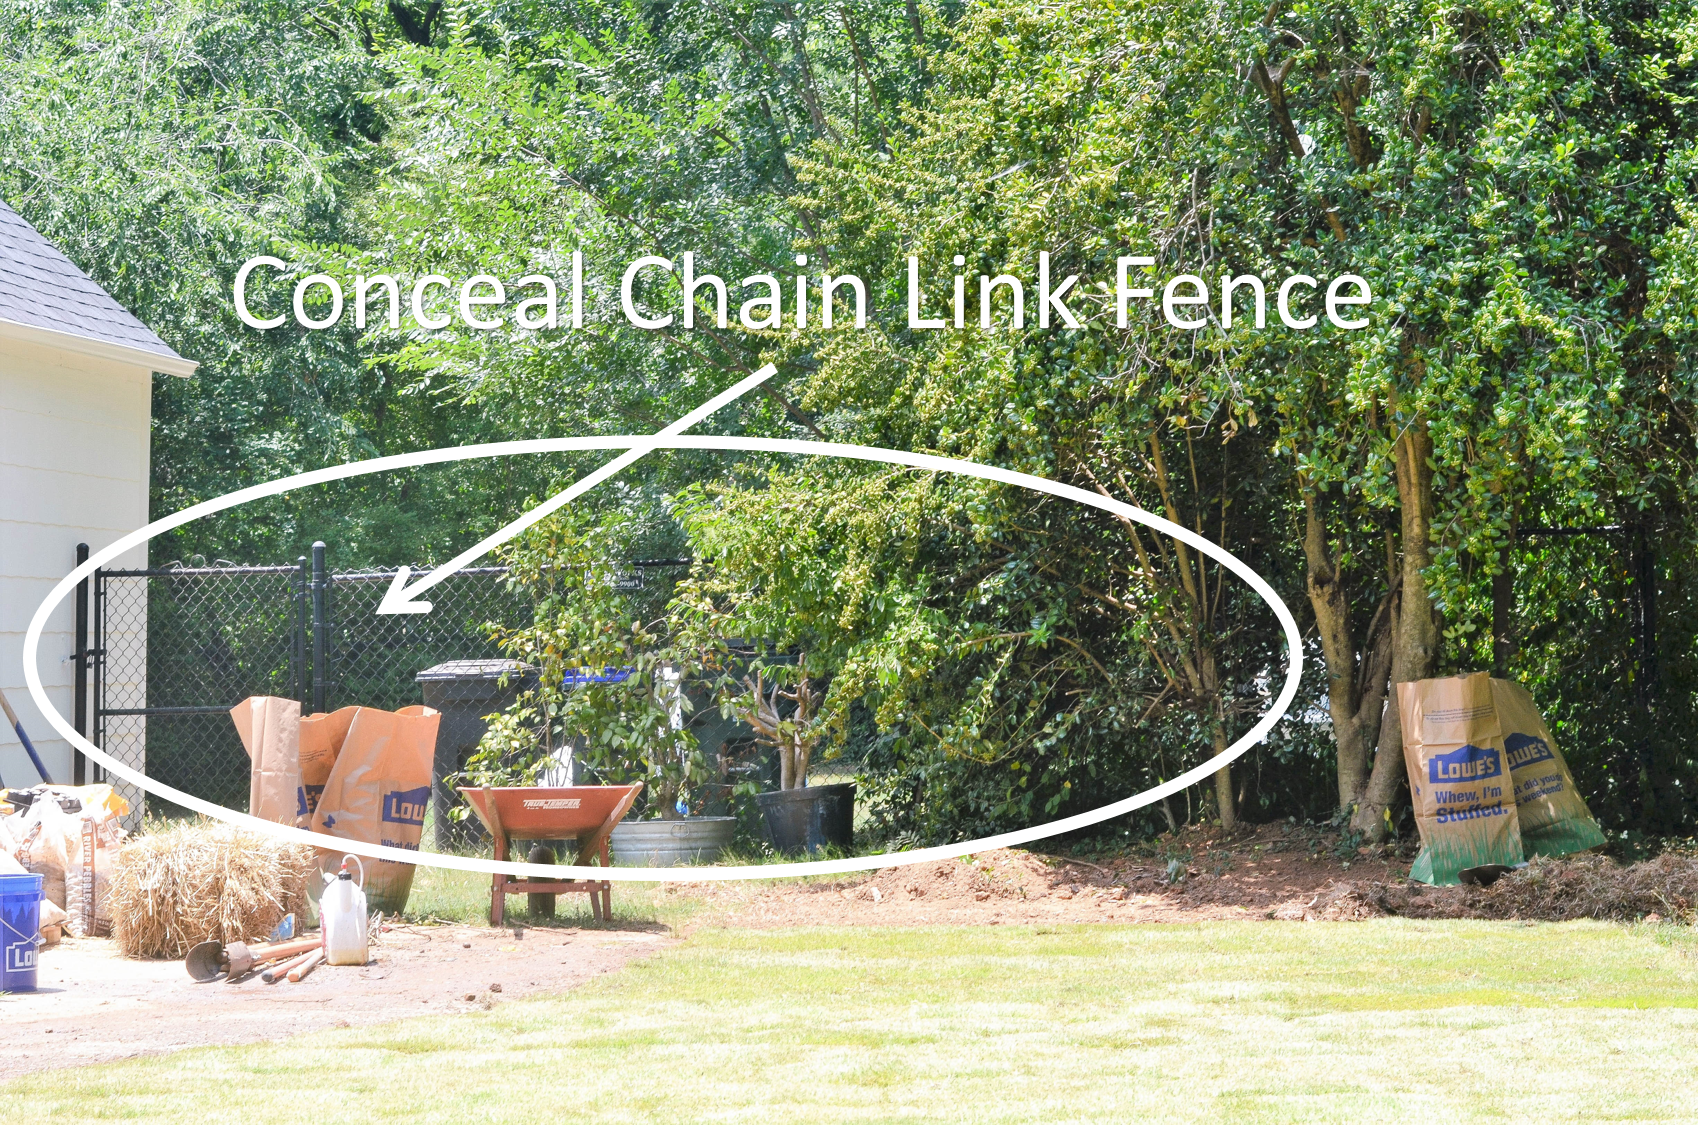
Like any new house it takes time to move in and get your bearings.  Still deciding on the feel for the interior, Brian and I decided to start by tackling the outside of our new (old) abode.  We miss not having a front porch, so we decided to create a side patio, a place where we could gather with neighbors, have al fresco dinners and when the weather cools, Bri and I can have outdoor date nights by a fire.  What we started with (photo above) was an overgrown mess, that meekly hid an ugly chain link fence. And what we ended with was this...

I'm in love with our string light patio!  The river rocks add texture to the space and I'm obsessed with our super budget friendly solution to concealing that chain link fence (yup, that's right...that faux fence you see is hiding our chain link!  And it cost less than $150 to make!) I've outlined the steps below, forgive the lack of progress photos, with two toddlers running around, Brian and I were more concerned about finishing the project rather than documenting. 

Patio Makeover

First things first, we needed to remove overgrown shrubs and weeds to open up the space.

Our other big objective was to conceal the chain link fence.  We weren't in a place, budget wise, to replace it entirely, so we were looking for a budget friendly way to hide it.  We threw around the idea of planters, which I still think would have worked, but ultimately, we wanted a privacy fence to separate the front and back yards.  So, when we came across raw cut cedar fence boards on sale at our local Lowes, we decided to try to build horizontal panels that we would attach to our current fence...think an accent wall for outside!  We started by cutting off the dog ears on our fence boards, then attached each board using brass screws to two furring strips (this holds each panel together on the backside).  We made three panels, each consisting of 15 individual cedar boards.  Once the panels were made we attached the panels to our chain link fence using galvanized pipe grips.  This is what it looked like then...

Perfect Solution To Hide a Chain Link Fence

Also, one thing to note, the weekend before, we had removed all the weeds, hung string lights (industrial ones here) and prepped and poured our river rock "floor".  If you're doing the entire project I'd say this is a two weekend task.  In the photo above you can see the seams between our panels, I wanted a more finished look, so we used simple trim (cost $1.25 a piece) to hide the seams and to frame the entire cedar fence.

Before & After  |  Patio Makeover

We used Minwax Golden Pecan to stain and recommend sealing it with a protective clear coat to prevent fading.  And there you have it, a side patio that's pretty, functional and budget friendly!

Before & After Patio Makeover

The table is one we already owned (similar one found here), and the directors chairs were purchased at a bargain at $25 a piece from World Market's end of summer sale (I did the happy dance when I found them!).  If you're in the market for some, these (set of two) have similar cross legs.

Beautiful & Budget Friendly Way to Hide A Chain Link Fence

Now that cool weather is finally on it's way here in Atlanta, I think tonight calls for dinner outside!  Wishing you a wonderful weekend friends!


Subscribe

Get IRON & TWINE delivered directly to your inbox!

Like always we respect your privacy.

Thank you!
 
In outdoor living
← Donut Hole CakeFall To Dos | How To Restore Wood Bowls →

michelle cannon smith

HELLO!

I’m so glad you’re here! After taking a blogging hiatus, we’re back and currently tackling one house project at a time, starting from the outside! With a new start & a fresh perspective, we’re living the simple life, at home and in the garden.

michelle cannon smith

Spring Fashion Uner $35 GIF.gif

spring fashion finds under $35

Bookshelf+styling+ideas.jpg

No Spend January & February
Under Sink Storage

MY FAVORITE UNDER SINK STORAGE


subscribe to iron and twine

INSTAGRAM


Did you catch today’s blog post?  Talked all things intermittent fasting!  Gave a recap for those new and inquiring and gave an update for those that have been kindly asking.  Again, do I think Intermittent Fasting is good for everyone?  Absolu
A bouquet for you and a bouquet for a friend 💐💐! One of the many reasons I grow garden roses and herbs together is that they make fragrant and pretty bouquets!  Now on the blog sharing my tips and favorite bouquet pairings👆🏻. Link in bio.
***
#da
No place I’d rather be 🥰. Today I’m in the children’s garden sharing how I’m turning a Rose shrub into a topiary and also showing you my simple trick to guarantee more basil!!! Stop by to say hello!  Always grateful for this
Cheerful Yellow Blooms to brighten your Monday 💛💛💛
***
#davidaustinroses #davidaustinroses🌹 #davidaustinrose #comtedechampagne #comtedechampagnerose #pottedherbs #containergarden #oregano #mint
Mother’s Day 2020 🥰  full hands, full heart ❤️ For all mamas out there, this is for you 👇🏻
***
Motherhood.  Mom, mother, madre, mama, mommy...a word that has no boundaries nor bloodline requirement.  A word for those that love unconditionall
Did you guys catch Rose Rehab today in stories?! Talked all about that dreaded Black Spot and shared what not to do when maintaining and caring for your rose shrubs 🤣😂. But seriously life, time and other things can so easily take precedent over the
michelle cannon smith


Subscribe

Get IRON & TWINE delivered directly to your inbox!

Like always we respect your privacy.

Thank you!  A confirmation email is headed to your inbox now!

COPYRIGHT © IRON & TWINE